As other people in the EMC {code} team started getting involved with Apache Mesos, I have been helping by fielding questions and troubleshooting installations of both Mesos and mesos-module-dvdi so that others can kick the tires and become subject matter experts. It was brought to my attention that a good clean walkthrough of adding external volume/storage support to an existing production Mesos cluster might be of value to others which brings us to this blog post. We will cover a couple examples of launching Marathon tasks to make use of our new found capability. Also, we will take a look at functionality that the mesos-module-dvdi brings to the table and talk about what those features mean to you.
Preflight Checklist
Before we begin, I want to make sure that everyone who is going to follow along has a properly configured Mesos cluster and for those that don’t have a Mesos cluster, there is a very good walkthrough guide by DigitalOcean that I would highly recommend. I would encourage performing every step in this guide and not skip or take short cuts when deploying your cluster as it can lead to wonky behavior of your cluster.

There are a number of open source projects out there that attempt to deploy a proper Mesos cluster, but each one that I have evaluated (there have been a lot) has always fallen short somewhere. – everpeace/vagrant-mesos currently only works for version 0.23.1 and older. There haven’t been updates to the project in some time. – mesosphere/playa-mesos runs on virtualbox, but I found a number of issues with how the nodes are configured and ran into issues using certain frameworks, such as the Elastic Search framework, because of virtualbox’s networking layer. The configuration that is deployed is only a single master node; so no high availability. This project also hasn’t been updated in some time. – minimesos project deploys a configuration that is backed by docker containers so if you need to modify something like the slave nodes (in our case, we need to) this isn’t going to be a good option. Like the previous method, single master and no high availability.
If you want kick the tires on all the functionality that Mesos has to offer, I would still recommend that you deploy these nodes by hand. If that is too time consuming or you don’t have access to AWS or hardware resources, playa-mesos gets you most of the way there. The {code} team has a fork of that project which has some bug fixes as well as some enhancements. You can find our fork on GitHub located at emccode/vagrant/playa-mesos and if you chose to go this route, the {code} fork of playa-mesos has mesos-module-dvdi already pre-configured using VirtualBox as the external storage provider in which case you can use this walkthough to verify your settings. Just a reminder, the purpose of this walkthrough is adding external persistent volumes for production Mesos environments in which you will most likely take the steps below and incorporate them into a DevOps tool that your organization uses.
mesos-module-dvdi Installation Walkthrough
mesos-module-dvdi builds on top of functionality that is provided by REX-Ray and DVDCLI. So the first thing we need to do is install both packages on all your Mesos slave/agent nodes (NOTE: that all steps outlined in this section needs to be done on all your slave/agent nodes as root). You can do that by running the following commands:
curl -sSL https://dl.bintray.com/emccode/rexray/install | sh -
curl -sSL https://dl.bintray.com/emccode/dvdcli/install | sh -
Then you need you configure REX-Ray with the storage provider you plan on using. Since I usually host my configurations on Amazon for demonstration purposes, I am going to configure REX-Ray to use EC2 and place the file at /etc/rexray/config.yml. This is what my configuration file looks like:
rexray:
  storageDrivers:
  - ec2
  volume:
    mount:
      preempt: true
    unmount:
      ignoreUsedCount: true
aws:
  accessKey: <YOUR_ACCESS_KEY>
  secretKey: <YOUR_SECRET_KEY>
You can do a simple test to make sure REX-Ray and DVDCLI are functioning properly by running the following command: rexray volume. If you need help on configuring REX-Ray for other storage platforms, you can view the REX-Ray configuration guide.
Next, we need to install the mesos-module-dvdi which gives us the ability to provision, mount, unmount external volumes to Mesos tasks. You can download the version that matches your Mesos configuration from our GitHub releases page. My Mesos cluster is running version 0.27.0, so I am going to download libmesos_dvdi_isolator-0.27.0.so and place the .so in the /usr/lib directory. We also need to create a Mesos isolator configuration file so that the Mesos slave/agent knows how to load the isolator module. Create the file /usr/lib/dvdi-mod.json with the following content inside (replace with your version of the downloaded isolator):
{
   "libraries": [
     {
       "file": "/usr/lib/libmesos_dvdi_isolator-0.27.0.so",
       "modules": [
         {
           "name": "com_emccode_mesos_DockerVolumeDriverIsolator",
           "parameters": [
            {
              "key": "isolator_command",
              "value": "/emc/dvdi_isolator"
            }
          ]
         }
       ]
     }
   ]
 }
Finally, we just need to add the hooks for the Mesos slave/agent to pick up the configuration file and load the isolator. You can do that by running the following shell commands:
echo "docker,mesos" | tee /etc/mesos-slave/containerizers
echo "com_emccode_mesos_DockerVolumeDriverIsolator" | tee /etc/mesos-slave/isolation
echo "file:///usr/lib/dvdi-mod.json" | tee /etc/mesos-slave/modules
service mesos-slave restart
Success! This configuration will also allow you to run external volumes for docker workloads which is why you see docker in the first command. To learn more about using external storage with the docker containerizer in Apache Mesos, please checkout this great article on the EMC {code} blog.

Exercising the mesos-module-dvdi
Now that we have all this configured correctly, lets start out by creating a couple of external volumes by launching a Mesos task. Create a file called basic.json with the following content inside:
{
  "id": "hello-mesos",
  "cmd": "while [ true ] ; do touch /var/lib/rexray/volumes/firstvolume/hello1 ; sleep 5 ; done",
  "mem": 16,
  "cpus": 0.1,
  "instances": 1,
  "env": {
    "DVDI_VOLUME_NAME": "firstvolume",
    "DVDI_VOLUME_OPTS": "size=5,iops=150,volumetype=io1,newfstype=xfs,overwritefs=false",
    "DVDI_VOLUME_DRIVER": "rexray",
    "DVDI_VOLUME_NAME1": "secondvolume",
    "DVDI_VOLUME_DRIVER1": "rexray",
    "DVDI_VOLUME_OPTS1": "size=6,volumetype=gp2,newfstype=ext4,overwritefs=false"
  }
}
Then we can launch the Marathon task by running the following shell command:
curl -k -XPOST -d @basic.json -H "Content-Type: application/json" :8080/v2/apps
This simply creates two new volumes called “firstvolume” and “secondvolume” and uses the default REX-Ray mount location /var/librexray/volumes to mount these volumes.
For a more complex example, lets stand up a simple web server with an external volume and scribble some data on it. Create a file called web.json with the following content inside and replace YOUR_NAME_HERE with your first name (be careful and try not to remove the single quote trailing it):
{
  "id": "webserver",
  "uris": [
    "https://github.com/dvonthenen/goprojects/raw/master/bin/statichttpserver"
  ],
  "cmd": "echo 'Hello, YOUR_NAME_HERE' $(cat /var/lib/rexray/volumes/webdata/readme.txt | wc -l) >> /var/lib/rexray/volumes/webdata/readme.txt && chmod u+x statichttpserver &&  ./statichttpserver -port=$PORT -path=/var/lib/rexray/volumes/webdata",
  "mem": 16,
  "cpus": 0.1,
  "instances": 1,
  "constraints": [
    ["hostname", "UNIQUE"]
  ],
  "env": {
    "DVDI_VOLUME_NAME": "webdata",
    "DVDI_VOLUME_OPTS": "size=5,iops=150,volumetype=io1,newfstype=xfs,overwritefs=false",
    "DVDI_VOLUME_DRIVER": "rexray"
  }
}
Then we can launch the Marathon task by running the following shell command:
curl -k -XPOST -d @web.json -H "Content-Type: application/json" :8080/v2/apps
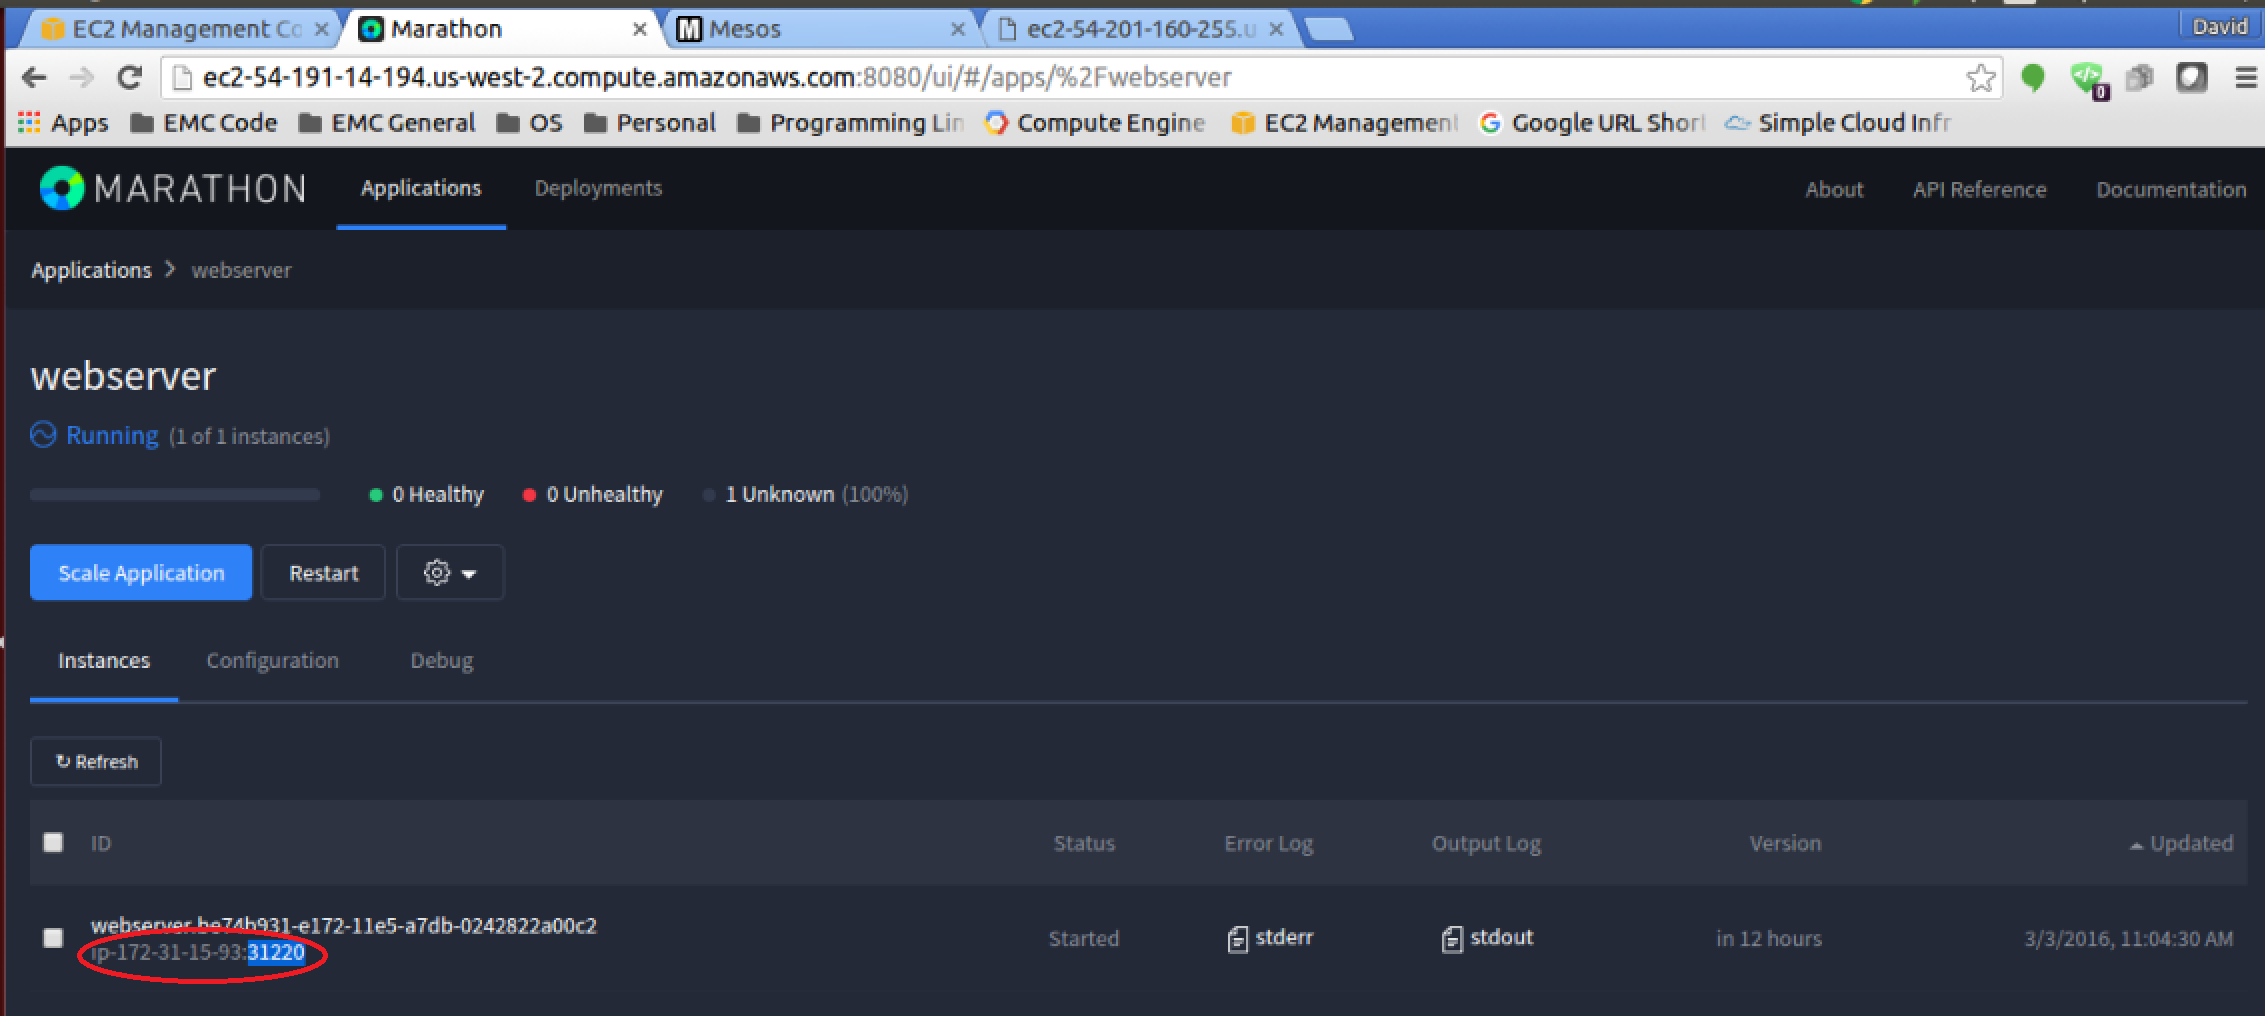
You can find out what slave/agent node and port the web server is running on by clicking on the running task in the Marathon UI and looking at the application configuration information on the page (as seen below).

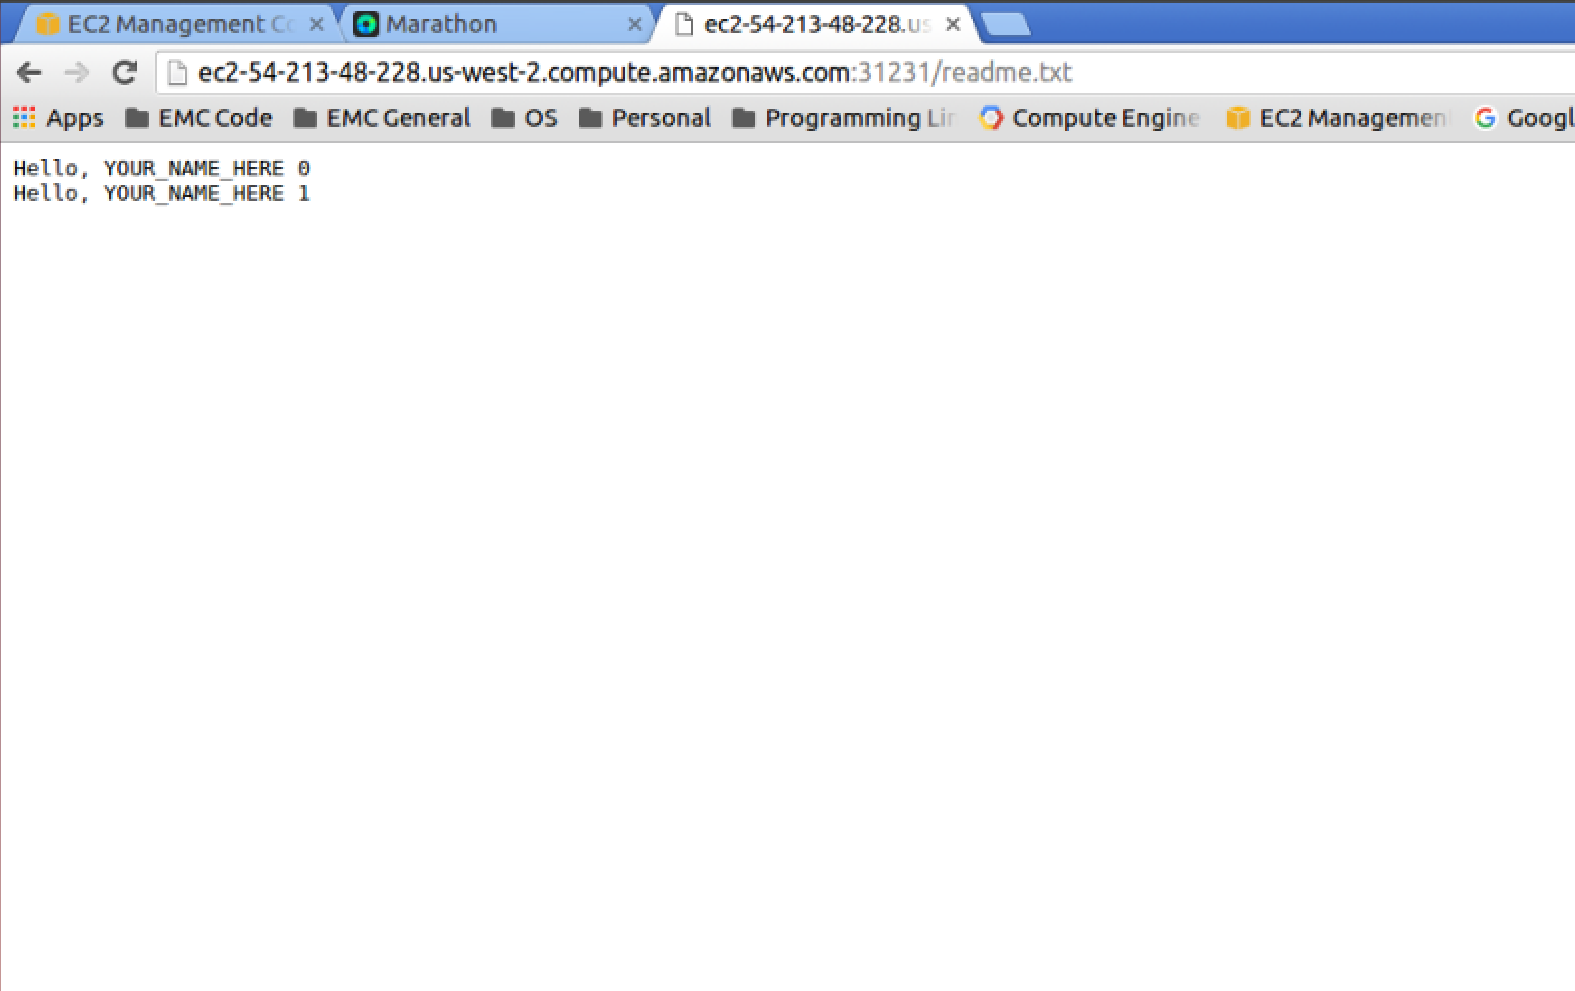
And if you open up that hostname and port in your web browser (you may have noticed that my FQDN name isn’t the same since I configured my EC2 instances without elastic IPs), you will have accessed the webserver we downloaded from my GitHub account and you should see a file readme.txt at the root. When you click that readme.txt to display the contents, you should see your name inside the text file.

Although the second example is a fairly meaningful real world example of using external volumes/storage, the real benefits don’t become apparent until you start doing things like failing the Mesos slave/agent node that is currently running the task. We can simulate this failure, by simply stopping the Marathon task and relaunching it. The new instance of our task may start up on a different node, but the important take away is that the external volume from the first instance will be reattached to the new task thus preserving any prior data. If you open the readme.txt after the task enters the running state, you should see the previous “Hello” line with a “0” at end now followed by a “Hello” line ending in “1” that this new instance has added on. Now just imagine a database like PostgreSQL or an Elastic Search node as a Marathon task. Any failure in the Mesos slave/agent or health check will trigger the task to start up from its previous state on a new node. Say “Hello” to high availability!

What’s Next…
Very cool! Hopefully this served as a good guide to adding external volume/storage support to your existing Apache Mesos cluster using REX-Ray, DVDCLI, and mesos-module-dvdi. I have a couple of ideas on some follow up blog posts… thinking about how I do dev/test for mesos-module-dvdi with Docker containers or perhaps more about frameworks. If you have any topics you might want me to discuss, please drop me a line on twitter at @dvonthenen.


